Business Manager for Facebook – Make Money With It!
- December 11, 2022
- Facebook, Inbound Sales, Lead Generation, Social Media
Looking to start doing more with your socials? Want to learn how to use Business Manager for Facebook?
Facebook Business Manager is probably one of the most powerful yet most unpopular tools created by the social network.
Powerful because of the huge amount of tasks that it has been designed to help with, but unpopular because of its complexity and extensive list of bugs.
The early adopter in me decided to migrate to Business Manager when it was first launched, a decision I greatly regretted at the time. However, it was very difficult to go back (as I’ll explain in a minute) so rather than join the crowd with another rant, I decided to give it a try.
Over time, many of its tasks were simplified, many bugs fixed, and now Facebook has created good support platforms and groups to help marketers with the issues they find.
Business Manager has improved a lot, and even if it still requires some ongoing polishing from Facebook, it is a great platform to help manage multiple Pages and advertising accounts.
This blog post is not trying to persuade you to use Business Manager, but an attempt to help you make an informed decision about whether or not Business manager fits your needs.
And the first thing is to understand what Business Manager is and why you should or shouldn’t use it.
What is Facebook Business Manager?
As Facebook itself explains, “Business Manager serves as a one-stop shop to manage business tools, business assets and employee access to these assets.”
Basically, it’s the place to manage all of your Facebook marketing and advertising activities. It’s also where you can control multiple users’ access to additional resources like your Instagram account and product catalogs. Here are some of its key functions:
- It keeps your business activities separate from your personal profile, so you don’t have to worry about posting in the wrong place (or getting distracted by cat videos when you’re trying to work).
- It’s a central place to track Facebook ads, with detailed reports that show how your ads are performing.
- It allows you to give vendors, partners, and agencies access to your pages and ads, without handing over ownership of the assets.
- Coworkers don’t see your personal Facebook information—just your name, work email, and pages and ad accounts.
Now that you know why you might want to use Facebook Business Manager, let’s get you set up.
Should You Use Business Manager?
Regardless of its problems, Business Manager is still a very useful tool for many.
You should certainly consider using this tool if your business falls in any of the following categories:
- An agency managing Pages and Ad Accounts from multiple clients.
- A large business with multiple Pages and several staff in charge of them.
- A business of any size that collaborates often with other businesses on common projects.
- An eCommerce company with a medium to large product range, wanting to benefit from retargeting campaigns.
- A blog or website that needs to share (or use) a custom audience with/from other websites.
- A business of any size advertising in multiple countries with different currencies and time zones.
However, before making the move there are also some other things you should consider.
Pros
- Manages multiple pages and advertising accounts easily.
- Prevents the mixing of personal profiles and business tasks.
- Allows collaborating with other businesses.
- Provides additional functions not available on Facebook, like sharing pixels, uploading catalogues, etc.
Cons
- Cannot remove the Main account from Business Manager.
- Does not provide much information and support (hoping this article helps with that).
- Requires extra learning due to complex and inconsistent processes.
- Must put up with bugs – Facebook keeps fixing errors and improving the tool, but other bugs seem to appear daily.
I must say, though, that several of those “bugs” are not really glitches, but more related to users’ lack of understanding of the tool.
How to set up Facebook Business Manager
Step 1. Create a Facebook Business Manager account
The first stage of setting up Business Manager is to create an account. You’ll need to use a personal Facebook profile to confirm your identity but, as mentioned above, your coworkers and partners won’t have access to the personal information in that account.
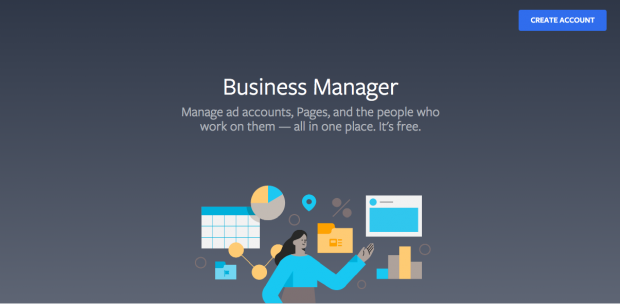
- Go to business.Facebook.com and click the big blue Create Account button in the top right.
- Enter your business name, your name, and the business email address you want to use to manage your Facebook Business Manager account, then click Next.

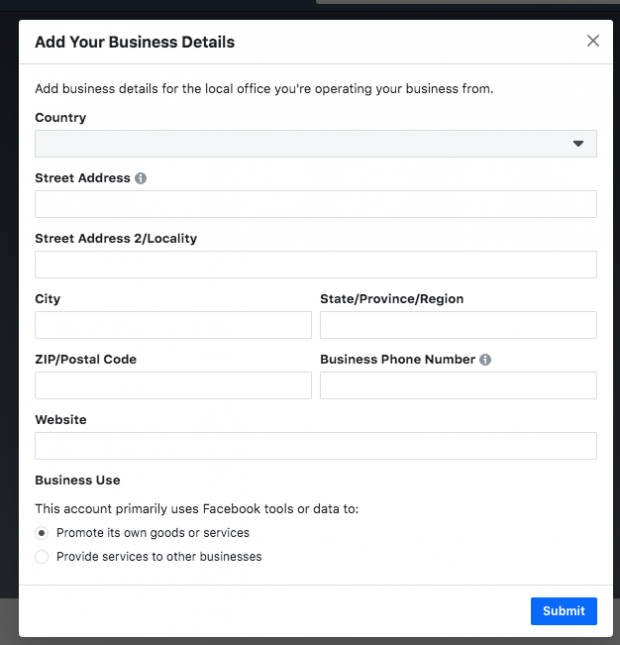
- Enter your business details: address, phone number, and website. You’ll also need to specify whether you’ll use this Business Manager account to promote your own business, or to provide services to other businesses (like an agency). When you’re finished, click Submit.
- Check your email for a message with the subject line “Confirm your business email.” Within the message click Confirm Now.
Step 2. Add your Facebook business page(s)
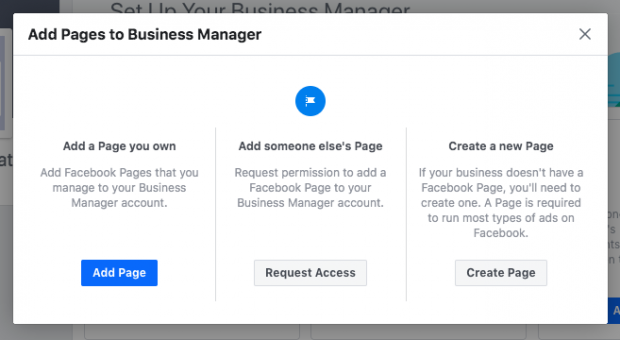
In this step, you have a couple of different choices. You can add an existing Facebook business page or create a new one. If you manage Facebook pages for clients or other businesses, you can also request access to someone else’s page.
That last distinction is important. While you can use Business Manager to manage clients’ Facebook pages and ad accounts, it’s important to use the Request Access option rather than the Add Page option. If you add your client’s pages and ad accounts to your Business Manager, they’ll have limited access to their own business assets. That’s a sure way to cause tension in your business relationship.
For the purposes of this post, we’ll assume you’re managing your own assets, rather than acting as an agency, so we won’t get into the Request Access process. But be sure to keep this difference in mind.
We have a guide that shows you how to set up a Facebook business page, so we’ll assume you already have one to add to Business Manager. If you haven’t created your page yet, hop on over to that post and come back here to add your page to Facebook Business Manager when you’re done.
To add your Facebook page to Facebook Business Manager:
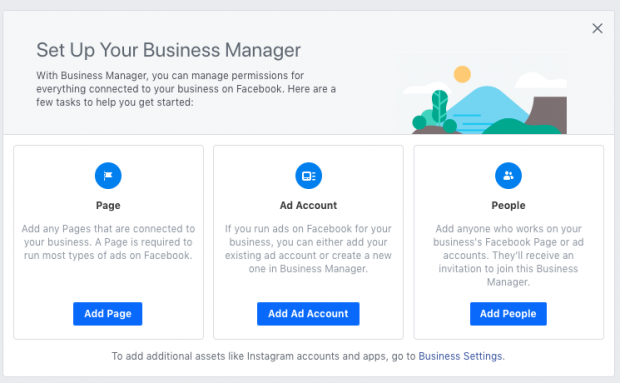
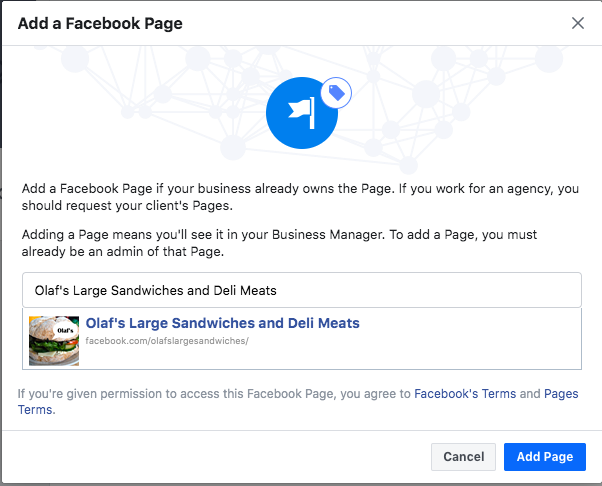
- From the Business Manager dashboard, click Add Page.Then, in the pop-up box, click Add Page again.
- Start typing the name of your Facebook business page in the text box. Your business page name should autocomplete below, so you can just click on it. Then click Add Page. Assuming you have administrator access to the page you’re trying to add, your request will be approved automatically.
- If you have more than one Facebook page associated with your business, add the remaining pages by following the same steps.
Step 3. Add your Facebook ad account(s)
Note that once you add your ad account to Facebook Business Manager, you can’t remove it, so it’s especially important only to add accounts you own. To access a client account, click Request Access instead.
If you’re already using Facebook ads, you can link your existing ad account as follows:
- From the Business Manager dashboard, click Add Ad Account, then Add Ad Account again, and then enter the ad account ID, which you can find in Ads Manager.
If you don’t already have a Facebook ads account, here’s how to set one up.
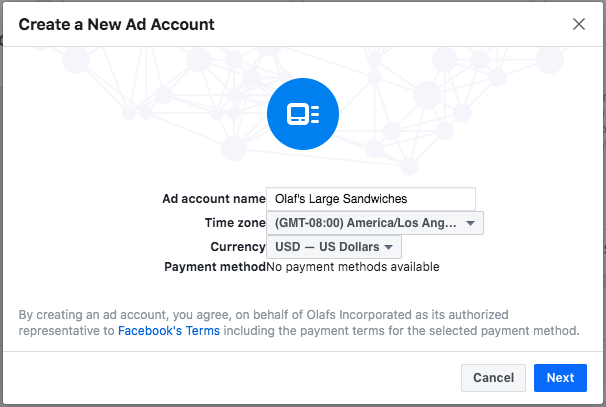
- From the Business Manager dashboard, click Add Ad Account, then Create Account.

- Enter your account details, then click Next.
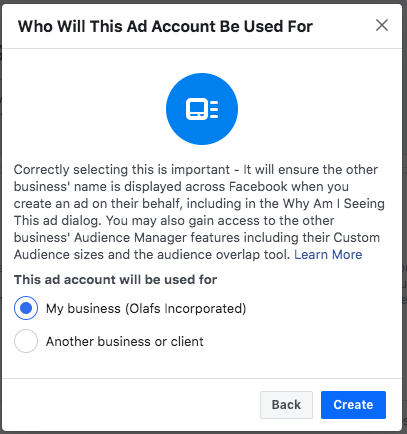
- Indicate that you are using the ad account for your own business, then click Create.
Each business can create one ad account right from the start. Once you are actively spending money in your first ad account, you will be able to add more based on your advertising spend. There is no option to request more ad accounts.
Step 4: Add people to help you manage your Facebook assets
Keeping on top of your Facebook marketing can be a big job, and you may not want to do it alone. Facebook Business Manager allows you to add team members so you can have a whole group of people working on your Facebook business page and ad campaigns. Here’s how to set up your team.
- From your Business Manager dashboard, click Add people.
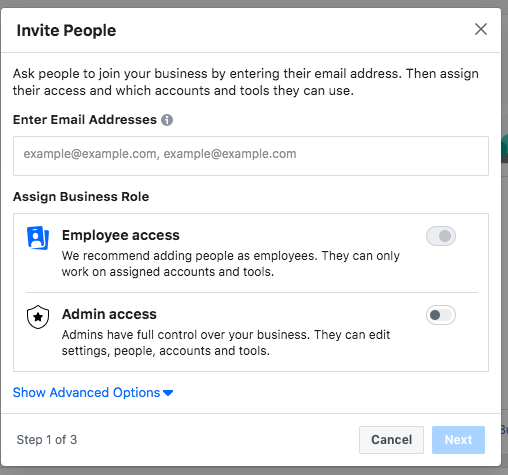
- In the pop-up box, enter the business email address of a team member you want to add. This might include employees, freelance contractors, or business partners, In this step, you are specifically adding individuals, rather than an agency or another business (you can do that in the next step).
You can decide whether to give these individuals limited account access (choose Employee access) or full access (choose Admin access). You can get more specific in the next stage. Make sure to add people using their work email addresses. Then click Next.
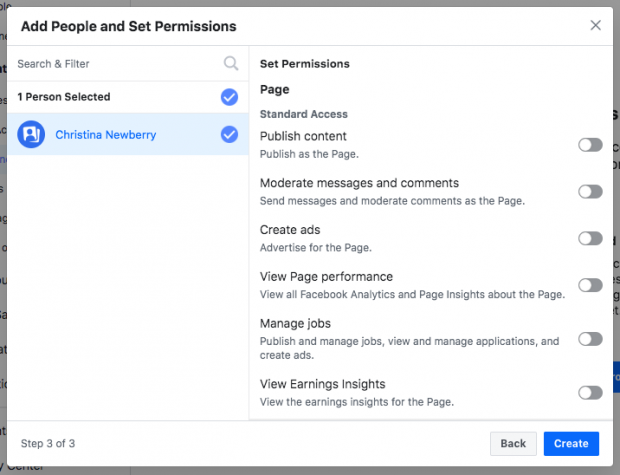
- In the left menu, click on Pages. Choose which pages you want this team member to work on. Customize the individual’s access using the toggle switches.
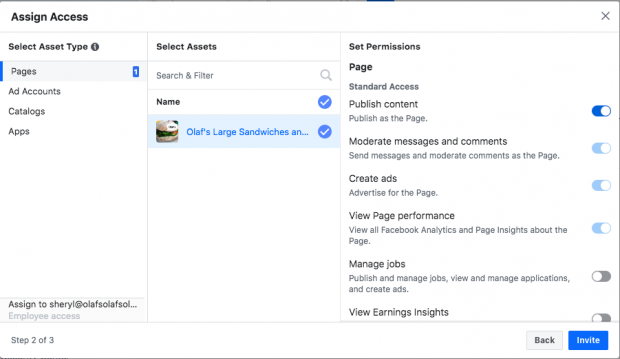
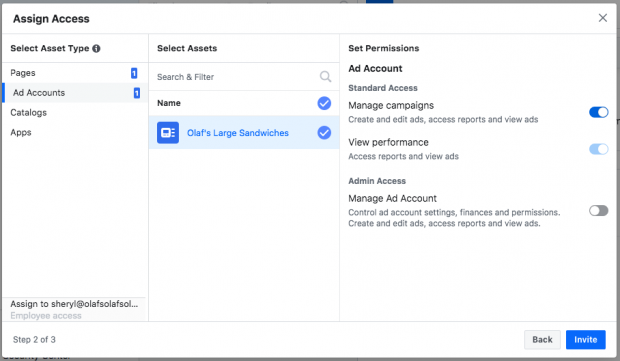
- Go back to the left menu and click on Ad Accounts. Again, customize the user’s access using the toggle switches. When you’re finished, click Invite.
In the left menu, you’ll also see options to add people to catalogs and apps, but you can skip these for now.
- To add more team members, click Add More People. When you’re finished, click Done.
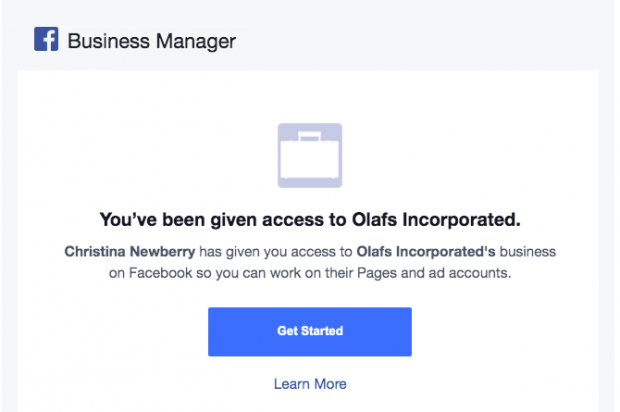
- Now you need to wait for each of the individuals to accept your invitation to be part of your Facebook Business Manager team.
They will each receive an email with information about the access you’ve given them and a link to get started, but it would be a good idea for you to send them a personal note or let them know directly that you’re giving them this access and they should expect the automated email with the link.
You can see all of your pending requests from your dashboard, and withdraw them at any time for people who have not responded.
If someone with access leaves your company or switches to a different role, you can revoke their permissions. Here’s how:
- From your Business Manager dashboard, click Business Settings at the top right.
- In the left menu, click People.
- Click on the name of the appropriate person. To remove them from your team, click Remove. Or, hover over the name of an individual asset and click the trash can icon to remove it.
Step 5: Connect your business partners or ad agency
This might not apply to you if you’re just getting started with Facebook advertising, but you can always come back to this step later.
- From your Business Manager dashboard, click Business Settings at the top right.
- In the left menu, click Partners. Under Partner to share assets with, click Add.
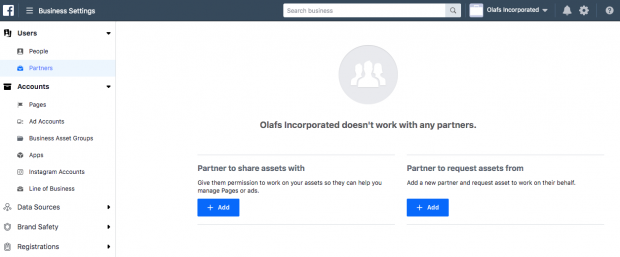
- Your partner must have an existing Business Manager ID. Ask them to provide it to you. They can find it in their own Business Manager under Business Settings>Business Info. Enter the ID and click Add.
The business you’ve just added can manage permissions for the individuals on their own teams from their own Facebook Business Manager account. That means you don’t need to worry about assigning and managing permissions for all the individual people who service your account at your agency or partner company, just the partner company itself.
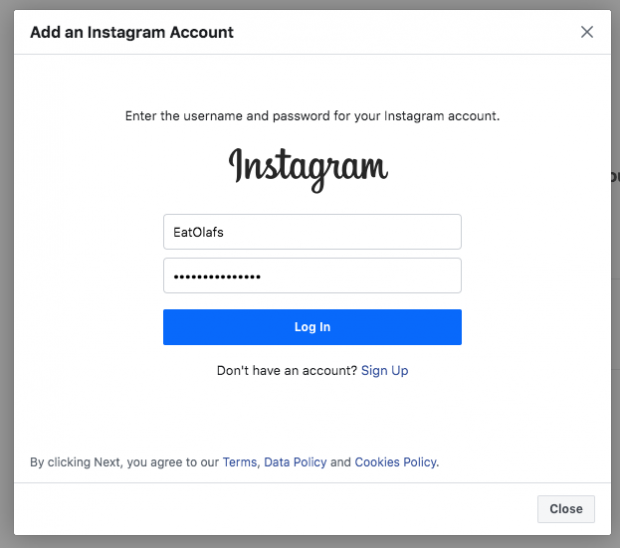
Step 6: Add your Instagram account
Now that you’ve got your Facebook assets set up, you can connect your Instagram account to Facebook Business Manager as well.
- From your Business Manager dashboard, click Business Settings at the top right.
- In the left column, click Instagram Accounts, then click Add. In the pop-up box, enter your Instagram login information and click Log In.
Step 7: Set up Facebook Pixels
What’s a Facebook Pixel? Put simply, it’s a small bit of code that Facebook generates for you. When you place this code on your website, it gives you access to information that will allow you to track conversions, optimize Facebook ads, build targeted audiences for your ads, and remarket to leads.
We recommend setting up your Facebook pixel right away, even if you’re not ready to start your first ad campaign yet, because the information it provides now will be valuable when you are ready to start advertising.
Our complete guide to using Facebook pixels is a great resource that walks you through everything you need to know about making the best use of the information a Facebook pixel can provide. For now, let’s get your pixel set up from within Facebook Business Manager.
- From your Business Manager dashboard, click Business Settings.
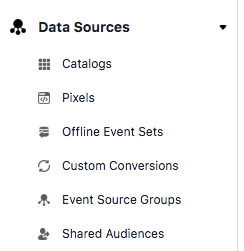
- In the left column, expand the Data Sources menu and click Pixels, then click Add.
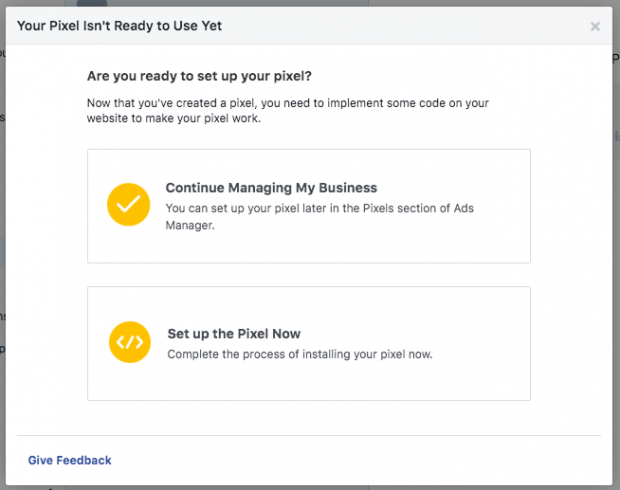
- Enter a name (up to 50 characters) for your pixel. Enter your website so Facebook can provide the best recommendations for how to set up your pixel, then click Continue. When you click Continue, you are agreeing to the pixel terms and conditions, so you should read those before you go any further.

- Click Set up the Pixel Now.
- You can create up to 10 pixels with your Business Manager.
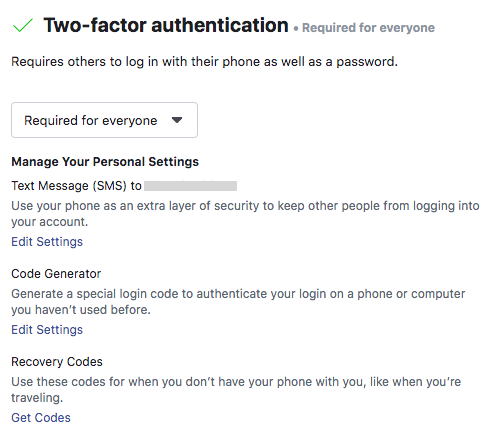
Step 8. Increase security on your account
One of the advantages of using Facebook Business Manager is that it offers extra security for your business assets.
- From the Business Manager dashboard, click Business Settings.
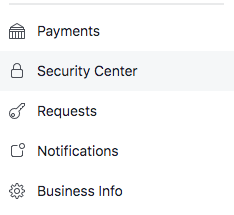
- In the left menu, click Security Center.
- Set up two-factor authentication. Setting it as Required for Everyone offers the highest security.
How to create your first campaign in Facebook Business Manager
Now that your account is set up and your pixels are in place, it’s time to launch your first Facebook ad.
Step 9: Place your first ad
We’ve got a full guide that explains all the strategy and specific details you need to know to create compelling and effective Facebook ads. So here, we’ll just walk you through the steps you need to take to get an ad up and running in Business Manager.
- From your Business Manager dashboard, click Business Manager on the top left.
- Under the Advertise tab, click Ads Manager, then click the green Create button.
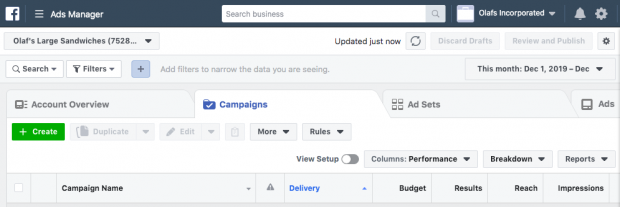
- Choose your campaign objective, target your audience, set your budget and schedule, and choose your specific ad types and placements following our step-by-step instructions.
Organize Facebook Business Manager with business asset groups
As the number of assets in your Facebook Business Manager grows, it can become difficult to keep track of everything. Business asset groups help keep your pages, ad accounts, and team members organized and clear.
Step 10: Create your first business asset group
- From the Business Manager dashboard, click Business Settings.
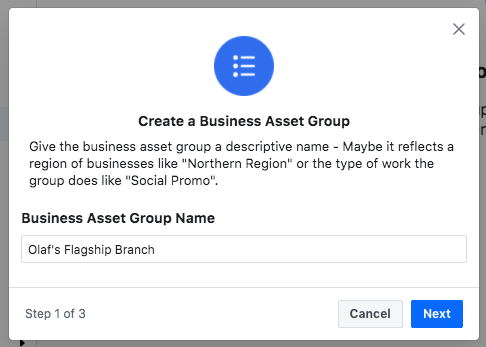
- From the left menu, under Accounts, click Business Asset Groups, then click Create Business Assets Group.

- Choose whether to organize your assets based on brand, region, agency, or another category, then click Confirm.

- Name your business asset group, then click Next.
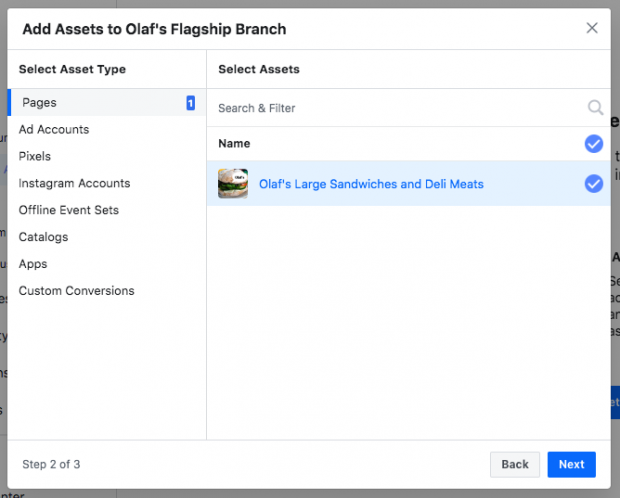
- Choose which assets to add to this asset group. You can add pages, ad accounts, pixels, and Instagram accounts, as well as offline events, catalogs, apps, and custom conversions. When you’ve selected all of the relevant assets, click Next.
- Choose which people to add to this asset group. You can control their access to all assets within the group from one screen. When you’re finished, click Create.
And that’s it! With the small amount of effort invested today, you’ve got everything centralized in one spot, and you’re ready to use Facebook Business Manager to make the most of your Facebook ads and marketing efforts.
The Serial Seller Sign-Off
Business Manager is a very powerful tool with many great functionalities. But as such, to master it requires lots of experience and practice (and also some patience).
The good news is that its recent facelift and the ongoing creation of groups and support pages show Facebook’s commitment to improving the tool and making it an effective business solution for everyone.
I don’t think as a business owner, you can really afford not to be using Business Manager for Facebook.
If you want some help with your business and want to start utilizing Facebook and Instagram more, Book a Call With Us Now!
About us and this blog
We are a Full-Service Sales & Marketing provider that aims to help small to medium businesses increase their leads and sales while helping remove the business owners from their day-to-day activities so they can focus more on the long-term goals of their business.
Book a Meeting with us!
We offer Done-For-You Sales, Sales Coaching, and Advisory as well as Digital Marketing Services. If you want to increase the leads generated for your business and need some guidance and accountability, book a call with us now.
Pingback: Where is Facebook Ads Manager?